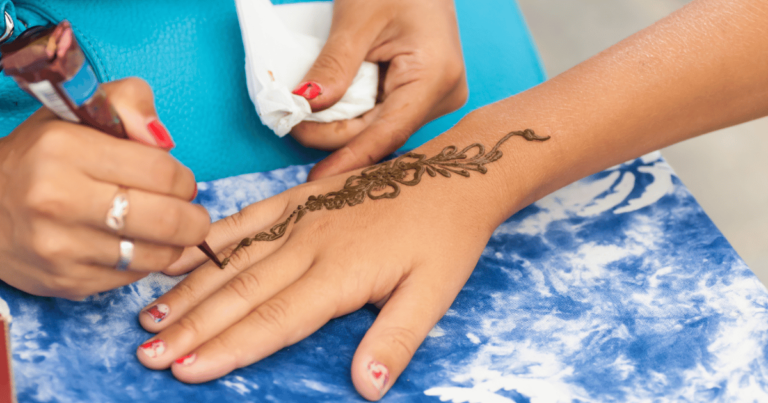
Mehndi, also known as henna, is more than a decorative art—it’s an expression of culture, tradition, and celebration. Whether you’re a bride-to-be looking for the perfect wedding look, a fashion enthusiast exploring cultural trends, or someone simply captivated by the intricate designs, mehndi holds a special charm.
Many people often assume mehndi designs are complicated and time-consuming. However, creating stunning mehndi patterns can be surprisingly simple. This guide dives into accessible design ideas, tips to perfect the art, and a quick FAQ section for budding mehndi enthusiasts. Brides, cultural fashion enthusiasts, and wedding planners, pay attention—this one’s for you.
Table of Contents
Why Choose an Easy Mehndi Design?
While elaborate designs will always have their place in weddings and festivities, there’s been a rising trend toward minimalism and simplicity in mehndi. Here’s why easy mehndi designs might be perfect for your next occasion.
- Time-Efficient: Quick and simple to create, ideal for last-minute touches.
- Versatile: Works for everyone—whether a formal bride, bridesmaid, or a guest attending a celebration.
- Elegant Minimalism: Less is more. Simple designs often appear cleaner and more modern.
- Perfect for Beginners: Provides uncomplicated patterns for anyone new to the art of mehndi.
Types of Easy Mehndi Designs
Not all mehndi designs are created equal, and choosing the right style depends on your personal taste, cultural significance, and event vibe. Here are some easy yet stunning options to explore.
1. Floral Mehndi Designs
A timeless classic, floral patterns rely on a mix of small and large flowers, often with leafy vines. These designs tend to look delicate and are suitable for any age group.
Tip: Use a mix of bold and thin strokes for added contrast!
2. Mandala Mehndi Designs
Mandalas are circular designs that start at the center of the palm and radiate outward. These are highly symmetrical and visually striking, yet surprisingly easy to draw.
Where It Works: Engagement ceremonies, bridal mehndi, or intimate weddings.
3. Arabic Mehndi Designs
Arabic mehndi designs are known for their open spaces, bold flower motifs, and flowing patterns. They’re quick to apply and offer a sophisticated modern look.
Best For: Evening parties and pre-wedding functions.
4. Geometric Patterns
For those leaning toward contemporary aesthetics, clean lines, grids, and geometry create a statement-worthy yet effortless look.
Why Choose It: Geometric designs look professional without requiring the precision of overly intricate work.
5. Simple Finger Mehndi Designs
For a minimal yet elegant vibe, focus just on the fingers. Floral rings, dainty spirals, or geometric segments can make fingers stand out.
Best Used For: Casual gatherings, Eid celebrations, or cultural hangouts.
Quick Table for Inspirations
| Design Style | Difficulty | Best For | Key Details |
| Floral Mehndi | Easy | All occasions | Use bold flowers surrounded by vines. |
| Mandala Mehndi | Medium | Weddings, Engagements | Start from a central circle and use symmetry. |
| Arabic Mehndi | Easy | Festive Events, Party Looks | Bold, flowing patterns with ample empty spaces. |
| Geometric Patterns | Easy | Modern, Casual Events | Clean, linear patterns for a fresh, contemporary touch. |
| Finger Mehndi Designs | Very Easy | Minimalist Celebrations | Focus solely on delicate finger patterns and spirals. |
Tips to Perfect Your Mehndi Art
Whether you’re a professional or a newbie experimenting at home, every mehndi enthusiast can benefit from these tips!
- Prep the Skin: Clean your hands thoroughly to ensure the mehndi adheres well. Avoid using lotions before application.
- Practice with Cones: Use a sample cone on paper to practice lines, curves, and symmetry before applying on skin.
- Start Simple: If you’re a beginner, stick to basic designs like leaves, dots, and curved lines. Progress to complex patterns as you gain confidence.
- Work Slowly with Consistency: Aim for even pressure when squeezing the cone to ensure neat results.
- Perfecting the Stain:
- Leave mehndi on skin for at least 6-8 hours for a rich, dark stain.
- Apply a lemon-sugar mixture on the design once semi-dry to intensify the color.
- Avoid washing hands with soap for the first 24 hours after applying.
FAQs about Mehndi Designs
Still have questions? Here are answers to the most commonly asked questions.
1. How can I make my mehndi design last longer?
To ensure a long-lasting stain, avoid exposure to water for the first 24 hours. Use a lemon-sugar mixture to keep the paste hydrated while drying, ensuring deeper penetration.
2. Can I use pre-made stencils for mehndi?
Absolutely! Pre-made stencils are perfect for beginners and offer intricate patterns without hassle. Just stick the stencil to your skin, apply mehndi over it, and peel it off once dry.
3. Is natural henna better than chemical-based alternatives?
Yes, natural henna is safer and less likely to cause allergic reactions. Avoid black henna containing harmful chemicals like PPD as it can irritate sensitive skin.
4. How do I practice mehndi designs effectively?
Start with pencil sketches on paper till you get comfortable with patterns. Transition to practicing on your hand or a friend’s hand using a cone. Consistent practice is key!
5. How long does it take for mehndi to dry?
Mehndi typically dries in 15-20 minutes. However, leaving the paste intact for several hours (often overnight) results in a darker stain.
Bring Your Designs to Life
Making the perfect mehndi design doesn’t have to be overwhelming. With simple patterns, the right tools, and plenty of practice, anyone can create beautiful, eye-catching designs for any occasion.
Now, it’s your turn! Have a wedding, festive event, or casual get-together coming up? Experiment with these easy mehndi designs and share your work with friends and followers. Want personalized tips or ideas? Drop your questions in the comments!

